Rebirth Island's compact design and Resurgence respawn mechanic create the fastest-paced Warzone experience. Unlike Battle Royale mode where death means spectating, Resurgence lets eliminated players respawn as long as one squadmate survives—encouraging aggressive gameplay and constant combat. Mastering drop locations, understanding high-traffic zones, and optimizing loadout choices transforms average players into consistent winners on this small but deadly map.
Understanding Resurgence Mode Mechanics
Rebirth Island uses unique rules that fundamentally change strategy compared to standard Warzone:
- Automatic respawns: Dead teammates respawn every 20-30 seconds if at least one squad member is alive and not in combat
- Respawn disabled endgame: After 4th circle closes, respawns stop—death becomes permanent
- Smaller map: 40-player lobbies on 0.5km² map = constant engagements every 30-60 seconds
- Faster circles: Full match lasts 12-15 minutes (vs 25-30 minutes on Verdansk/Al Mazrah)
- No Gulag: Respawn system replaces Gulag 1v1s entirely
These mechanics reward aggressive pushing—eliminating enemies while maintaining one survivor guarantees full squad respawns. Conservative playstyles fail because passive teams get sandwiched between multiple aggressive squads.
💡 Pro Tip: Respawn Timing
Track the respawn countdown in bottom-left UI. Push enemies when your squad respawns in 5 seconds—they'll face 4v2 suddenly turning into 4v4, overwhelming them mid-fight.
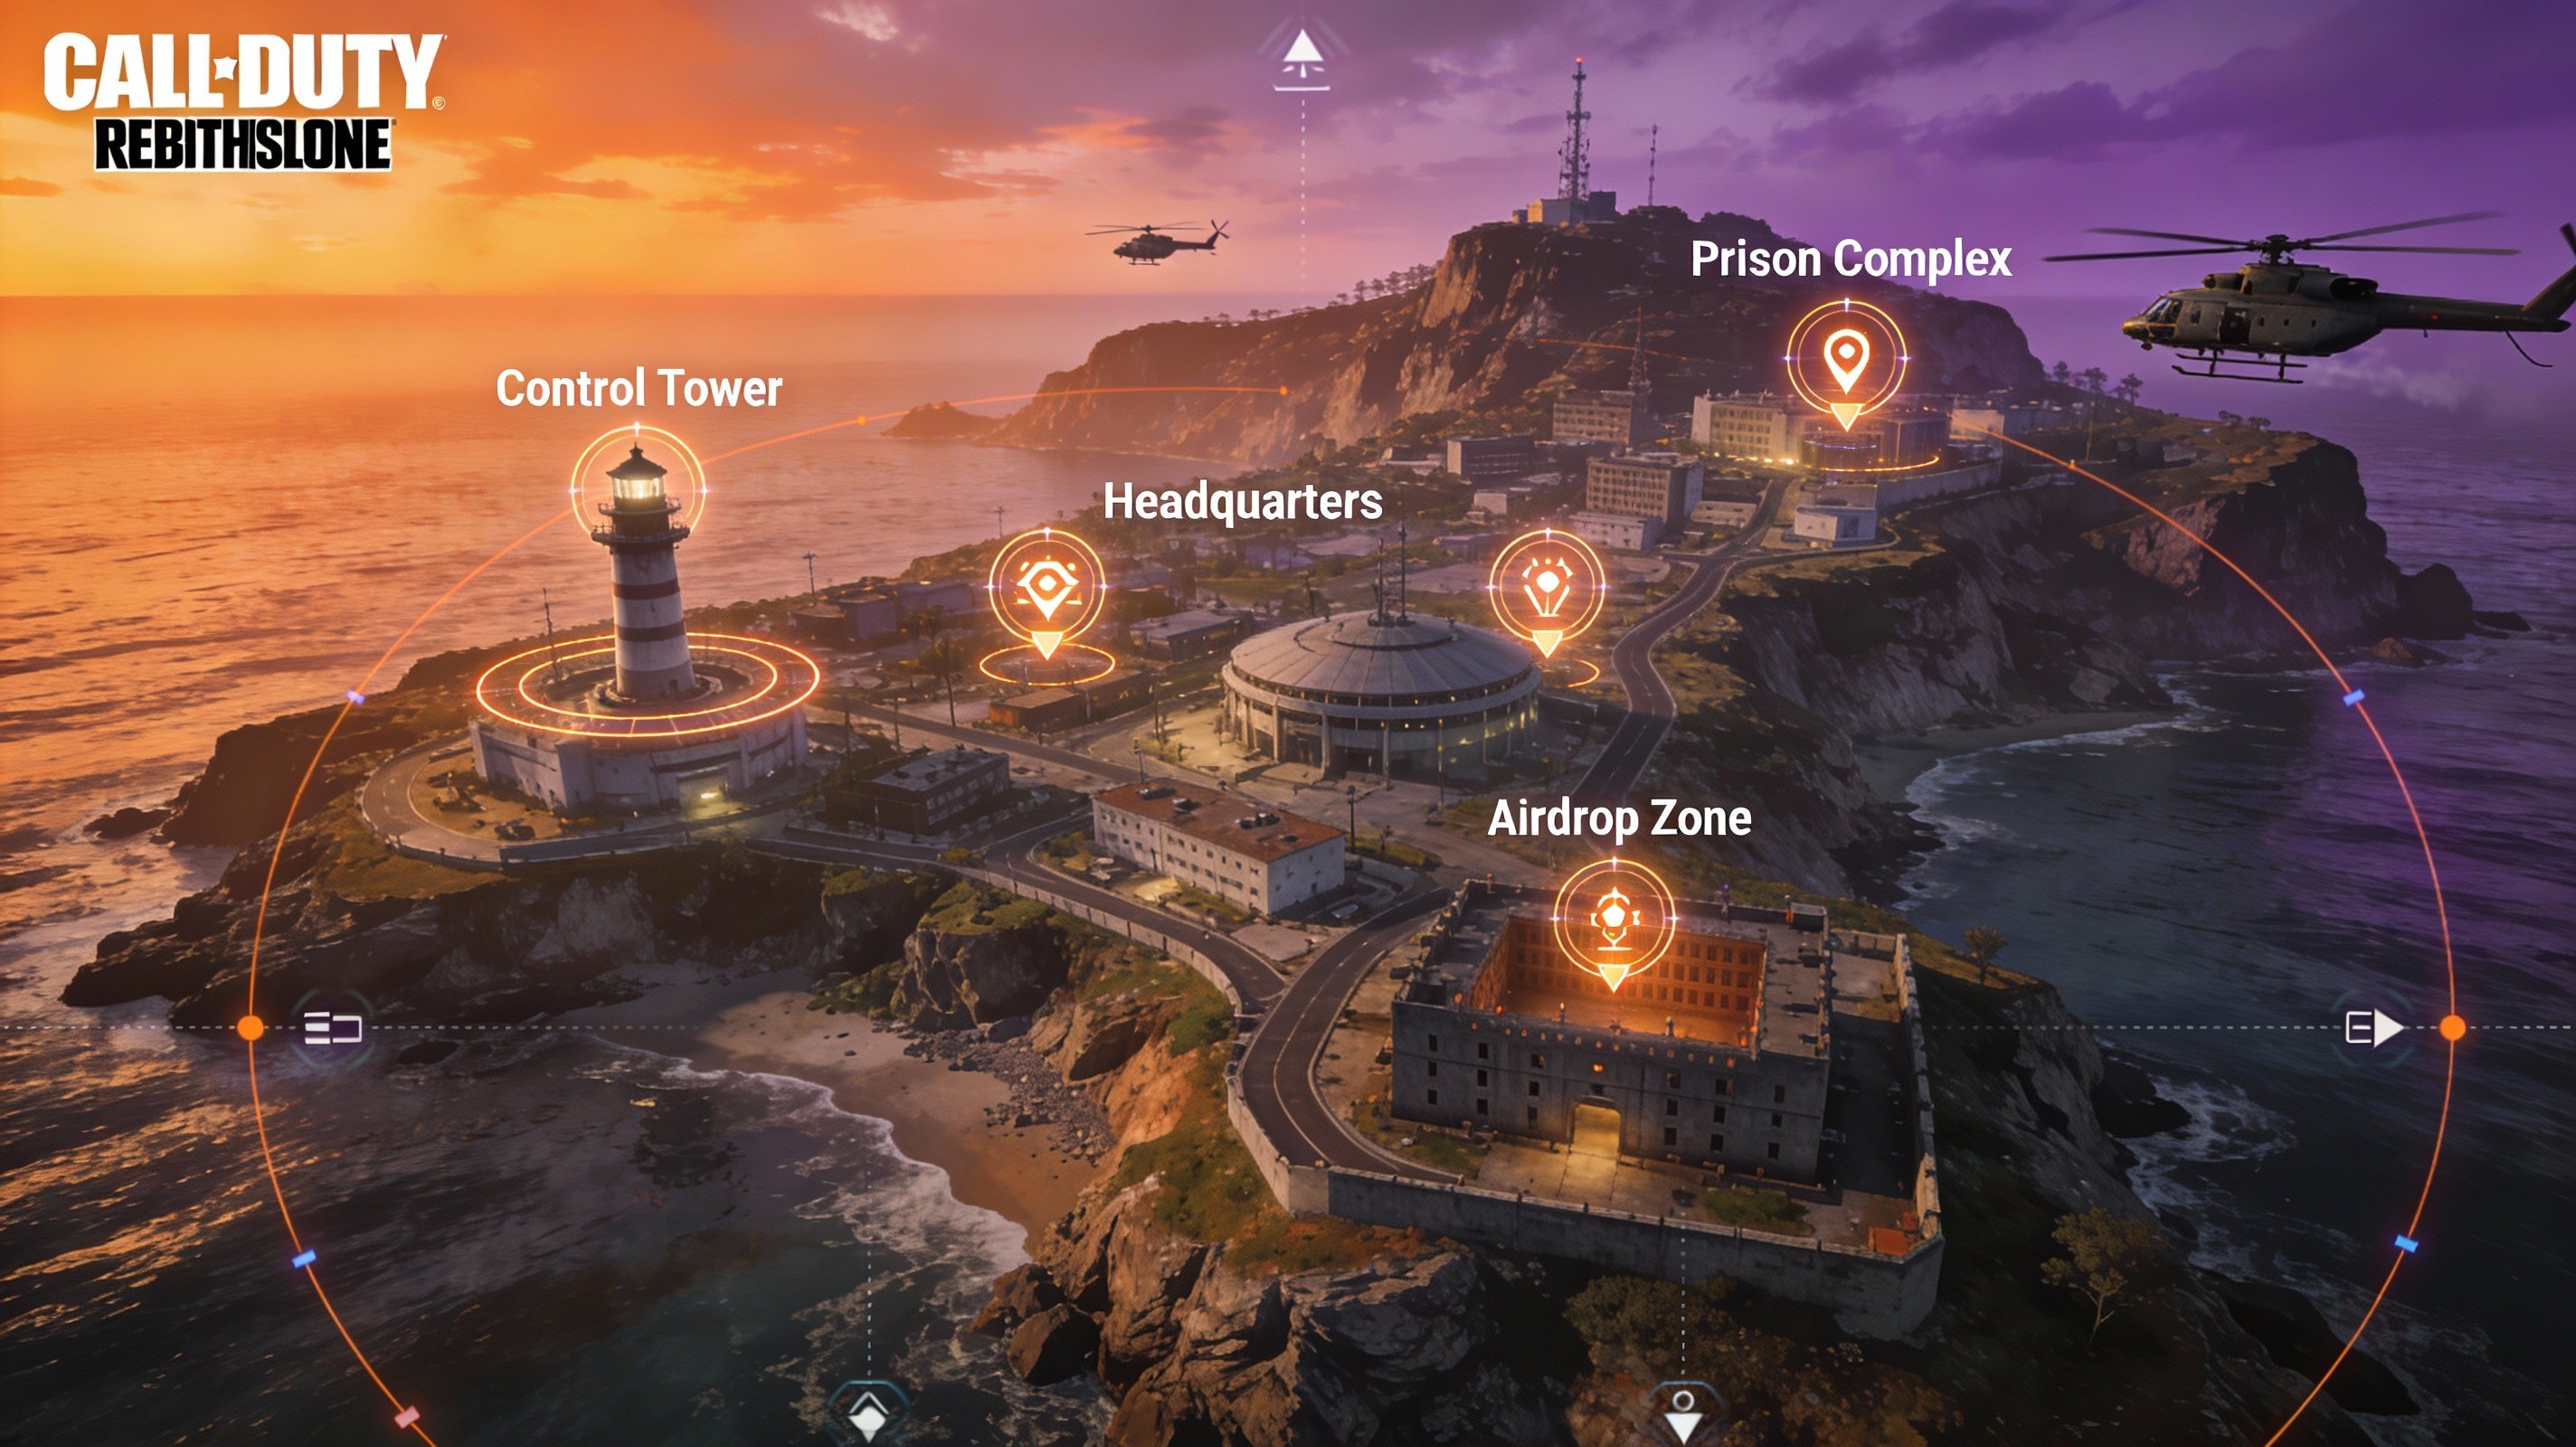
Best Drop Locations by Playstyle
1. Prison Block (Hot Drop) - High Risk/Reward
Why land here: Dense loot concentration in cell blocks, rooftop access for early eliminations, centralized for all circle rotations.
- Expected enemies: 4-6 squads (30-40% of lobby)
- Loot quality: Excellent—multiple loadout weapons, armor plates, cash
- Landing strategy: Drop on rooftop, grab weapons fast, hold high ground as enemies push stairs
- Rotation: Clear Prison then push toward Security or Headquarters for second-wave loot
- Team composition: Requires coordinated callouts—solo queue players often die here
Ideal for: Squads wanting 10-15 kill games and high-action warm-up before competitive modes.
2. Bioweapon Labs (Semi-Hot) - Balanced Choice
Why land here: Underground labs provide cover from third-parties, good loot, relatively controlled engagements.
- Expected enemies: 2-3 squads
- Loot quality: Very good—tight quarters mean efficient looting in 60 seconds
- Landing strategy: Drop through ceiling hatch, clear labs methodically, exit when looted
- Advantage: Limited entry points make defending easier than open-air POIs
- Disadvantage: Easy to get trapped if enemies control exits—always keep escape route clear
Ideal for: Mid-skill squads wanting consistent loot without instant chaos of Prison/Headquarters.
3. Harbor (Cold Drop) - Safer Start
Why land here: Edge of map location means fewer enemies, decent loot for full squad, easy rotations.
- Expected enemies: 0-2 squads
- Loot quality: Medium—requires hitting 3-4 buildings for full loadout
- Landing strategy: Split squad across warehouse/boat/docks simultaneously
- Rotation timing: Loot fast (90 seconds max), push toward circle or you'll get caught edge-running
- Late-game weakness: Harbor often outside final circles—requires early rotation awareness
Ideal for: Players learning map layout or completing specific challenges requiring survival time.
4. Headquarters (Hot Drop) - Most Contested
Why land here: Central location, multi-story buildings, excellent loot, guaranteed action.
- Expected enemies: 5-8 squads
- Loot quality: Excellent—top-tier ground loot spawns
- Key tactic: Control main building rooftop—overlooks 50% of Headquarters area
- Chaos factor: Constant third-parties from Prison, Security, Control Center
- Respawn abuse: Teams respawn directly on Headquarters rooftop helipads—expect waves of enemies
Ideal for: Experienced squads with strong communication and clutch potential.
5. Chemical Engineering (Hidden Gem)
Why land here: Underrated POI with surprising loot density, minimal contest rate.
- Expected enemies: 1-2 squads
- Loot quality: Good—small area means fast looting (60 seconds)
- Positioning advantage: Elevated terrain provides sightlines toward Living Quarters and Nova 6
- Rotation flexibility: Easy access to buy stations and bounty contracts
Ideal for: Smart players avoiding hot drops while maintaining aggressive tempo.
Optimal Loadout for Rebirth Island
Rebirth's close-quarters combat (80% of fights under 30m) demands different loadouts than large maps:
Primary Weapon: SMG (Required)
Top choices:
- Lachmann Sub: Fast TTK, minimal recoil, 40-round mag shreds in buildings
- Fennec 45: Fastest TTK under 10m (melts armor in 0.4 seconds), burns ammo fast
- ISO Hemlock: Balanced option—good range for Rebirth standards (0-25m effective)
Secondary Weapon: AR or Shotgun
Assault Rifle option: ISO Hemlock or M4 for 20-50m engagements (only 20% of fights)
Shotgun option: Lockwood 300 for building pushes—one-shot down potential saves time
Perks Priority
- Double Time: Increased Tac Sprint duration essential for constant rotations
- Fast Hands: Faster reloads = less vulnerability during squad wipes
- Tempered: Plate to full armor with 2 plates instead of 3 (game-changer for Rebirth pace)
- High Alert or Ghost: High Alert for aggressive players, Ghost for endgame positioning
Equipment
- Lethal: Semtex (instant explosion unlike C4 detonation delay)
- Tactical: Stun Grenades (slows enemy aim for easy SMG spray)
⚡ Warzone TTK Calculator
Compare weapon time-to-kill stats for optimal loadout choices
Try CalculatorAdvanced Strategies for Consistent Wins
1. Control Respawn Locations
When enemies die, they respawn at nearest safe location—usually 50-100m from death spot. Predict respawn, pre-aim common areas (rooftops, edges), and eliminate repeatedly. Forcing 3-4 respawns drains their plates and morale.
2. Abuse Resurgence Countdown
If squadmate respawns in 10 seconds, play passive and survive. Enemy squads pushing assume you're alone—surprise them with sudden 2v4 turning into 4v4 when teammate respawns mid-fight.
3. Buy Station Prioritization
Early game: Buy loadout ASAP (only $10,000 in Rebirth vs $15,000+ in Battle Royale)
Mid game: Buy UAVs constantly—$4,000 UAV reveals enemy positions for easy push/avoid decisions
Late game: Buy self-revive ($4,000) and gas masks ($1,500) for endgame zone fights
4. Zone Rotation Timing
Move to next circle at 60-second mark (not last second). Late rotations = getting shot while running. Early rotations = choose power positions before enemies arrive.
5. Third-Party Discipline
Hear gunfight nearby? Wait 10-15 seconds before pushing. Let teams weaken each other, then wipe survivors at low HP. Pushing immediately means fighting fresh squads.
Common Mistakes to Avoid
Mistake 1: Landing Too Spread Out
Rebirth punishes split squads. Land within 20m of each other—close enough to assist fights instantly. Landing on opposite buildings = easy eliminations for coordinated enemies.
Mistake 2: Ignoring Loadout Buy
Ground loot is decent, but custom loadout weapons have perfect attachments. Prioritize getting $10,000 fast for loadout over excessive looting.
Mistake 3: Fighting During Respawn Countdown
UI shows "Respawn Blocked" when in combat. Pushing aggressively with dead teammates = they can't respawn. Play defensive until countdown clears, then re-engage with full squad.
Mistake 4: Staying in Same Building Too Long
Camping fails in Rebirth. Enemies respawn nearby, surround your building, and nade spam. Constant movement prevents getting trapped.
Frequently Asked Questions
What's the best way to survive final circle without respawns?
After 4th circle, treat Rebirth like standard Battle Royale. Secure power position (elevated terrain or buildings with multiple exits), stack plates (carry 8 minimum), and avoid unnecessary fights. Final 10 players = survival over kills.
Should I run Overkill or Tempered perk?
Tempered. Overkill gives two primaries but slows plate speed. Tempered lets you full-plate with 2 plates (saves 8-12 plates per match), crucial for Rebirth's constant combat. Pick up enemy weapons as secondary instead of Overkill.
How do I counter roof campers?
Don't challenge vertically—repositioning beats pushing stairs. Circle around building, use UAV to confirm position, and force them to rotate down. Alternatively, Semtex through windows or use Precision Airstrike ($3,500 at buy).
Is Rebirth good for warming up before Battle Royale?
Yes. 15-minute Rebirth matches provide more gunfights than 25-minute BR matches. Play 2-3 Rebirth games to warm up aim and decision-making before competitive BR modes. Transfers directly to close-quarters fights.
Conclusion
Rebirth Island rewards aggressive, coordinated squads who master SMG combat and abuse the Resurgence respawn system. Choose drop spots matching your skill level—Prison/Headquarters for experienced players, Chemical Engineering/Harbor for learning. Prioritize buying custom loadout within 3 minutes, maintain squad cohesion, and rotate early to avoid edge-zone deaths.
The fast pace makes Rebirth perfect for improving gun skill and decision-making under pressure. With 15-20 minutes per match versus 30+ for Battle Royale, you'll gain experience 2x faster—translating to better performance across all Warzone modes. Master these strategies through repetition, and consistent top-5 finishes become the norm rather than exception.