Choosing the right drop location in BGMI Season 4 determines your survival chances, loot quality, and positioning for final circles. Whether you prefer aggressive hot drops for high kills or strategic edge drops for consistent top 10 finishes, understanding map-specific loot density and rotation paths is essential for climbing ranks from Diamond to Ace this season.
Drop Strategy Overview: Hot vs Cold Drops
BGMI Season 4 rewards balanced gameplay—pure hotdropping tanks your average placement, while edge-camping limits kill points. The meta favors semi-hot drops: medium-density locations with 2-3 enemy squads, allowing early fights without instant elimination chaos.
| Drop Type | Enemy Squads | Loot Quality | Risk Level | Best For |
|---|---|---|---|---|
| Hot Drop | 5-8 squads | High (Lvl 3 gear) | Extreme | K/D farming, TDM practice |
| Semi-Hot | 2-4 squads | Medium-High | Moderate | Ranked climbing, balanced points |
| Cold Drop | 0-1 squad | Low-Medium | Low | Survival rating, consistent top 10 |
💡 Season 4 Meta Shift
New ranked system increases survival point weight by 15%. Top 5 finish with 3 kills = more points than 8 kills with 20th place death. Adjust drop strategy accordingly!
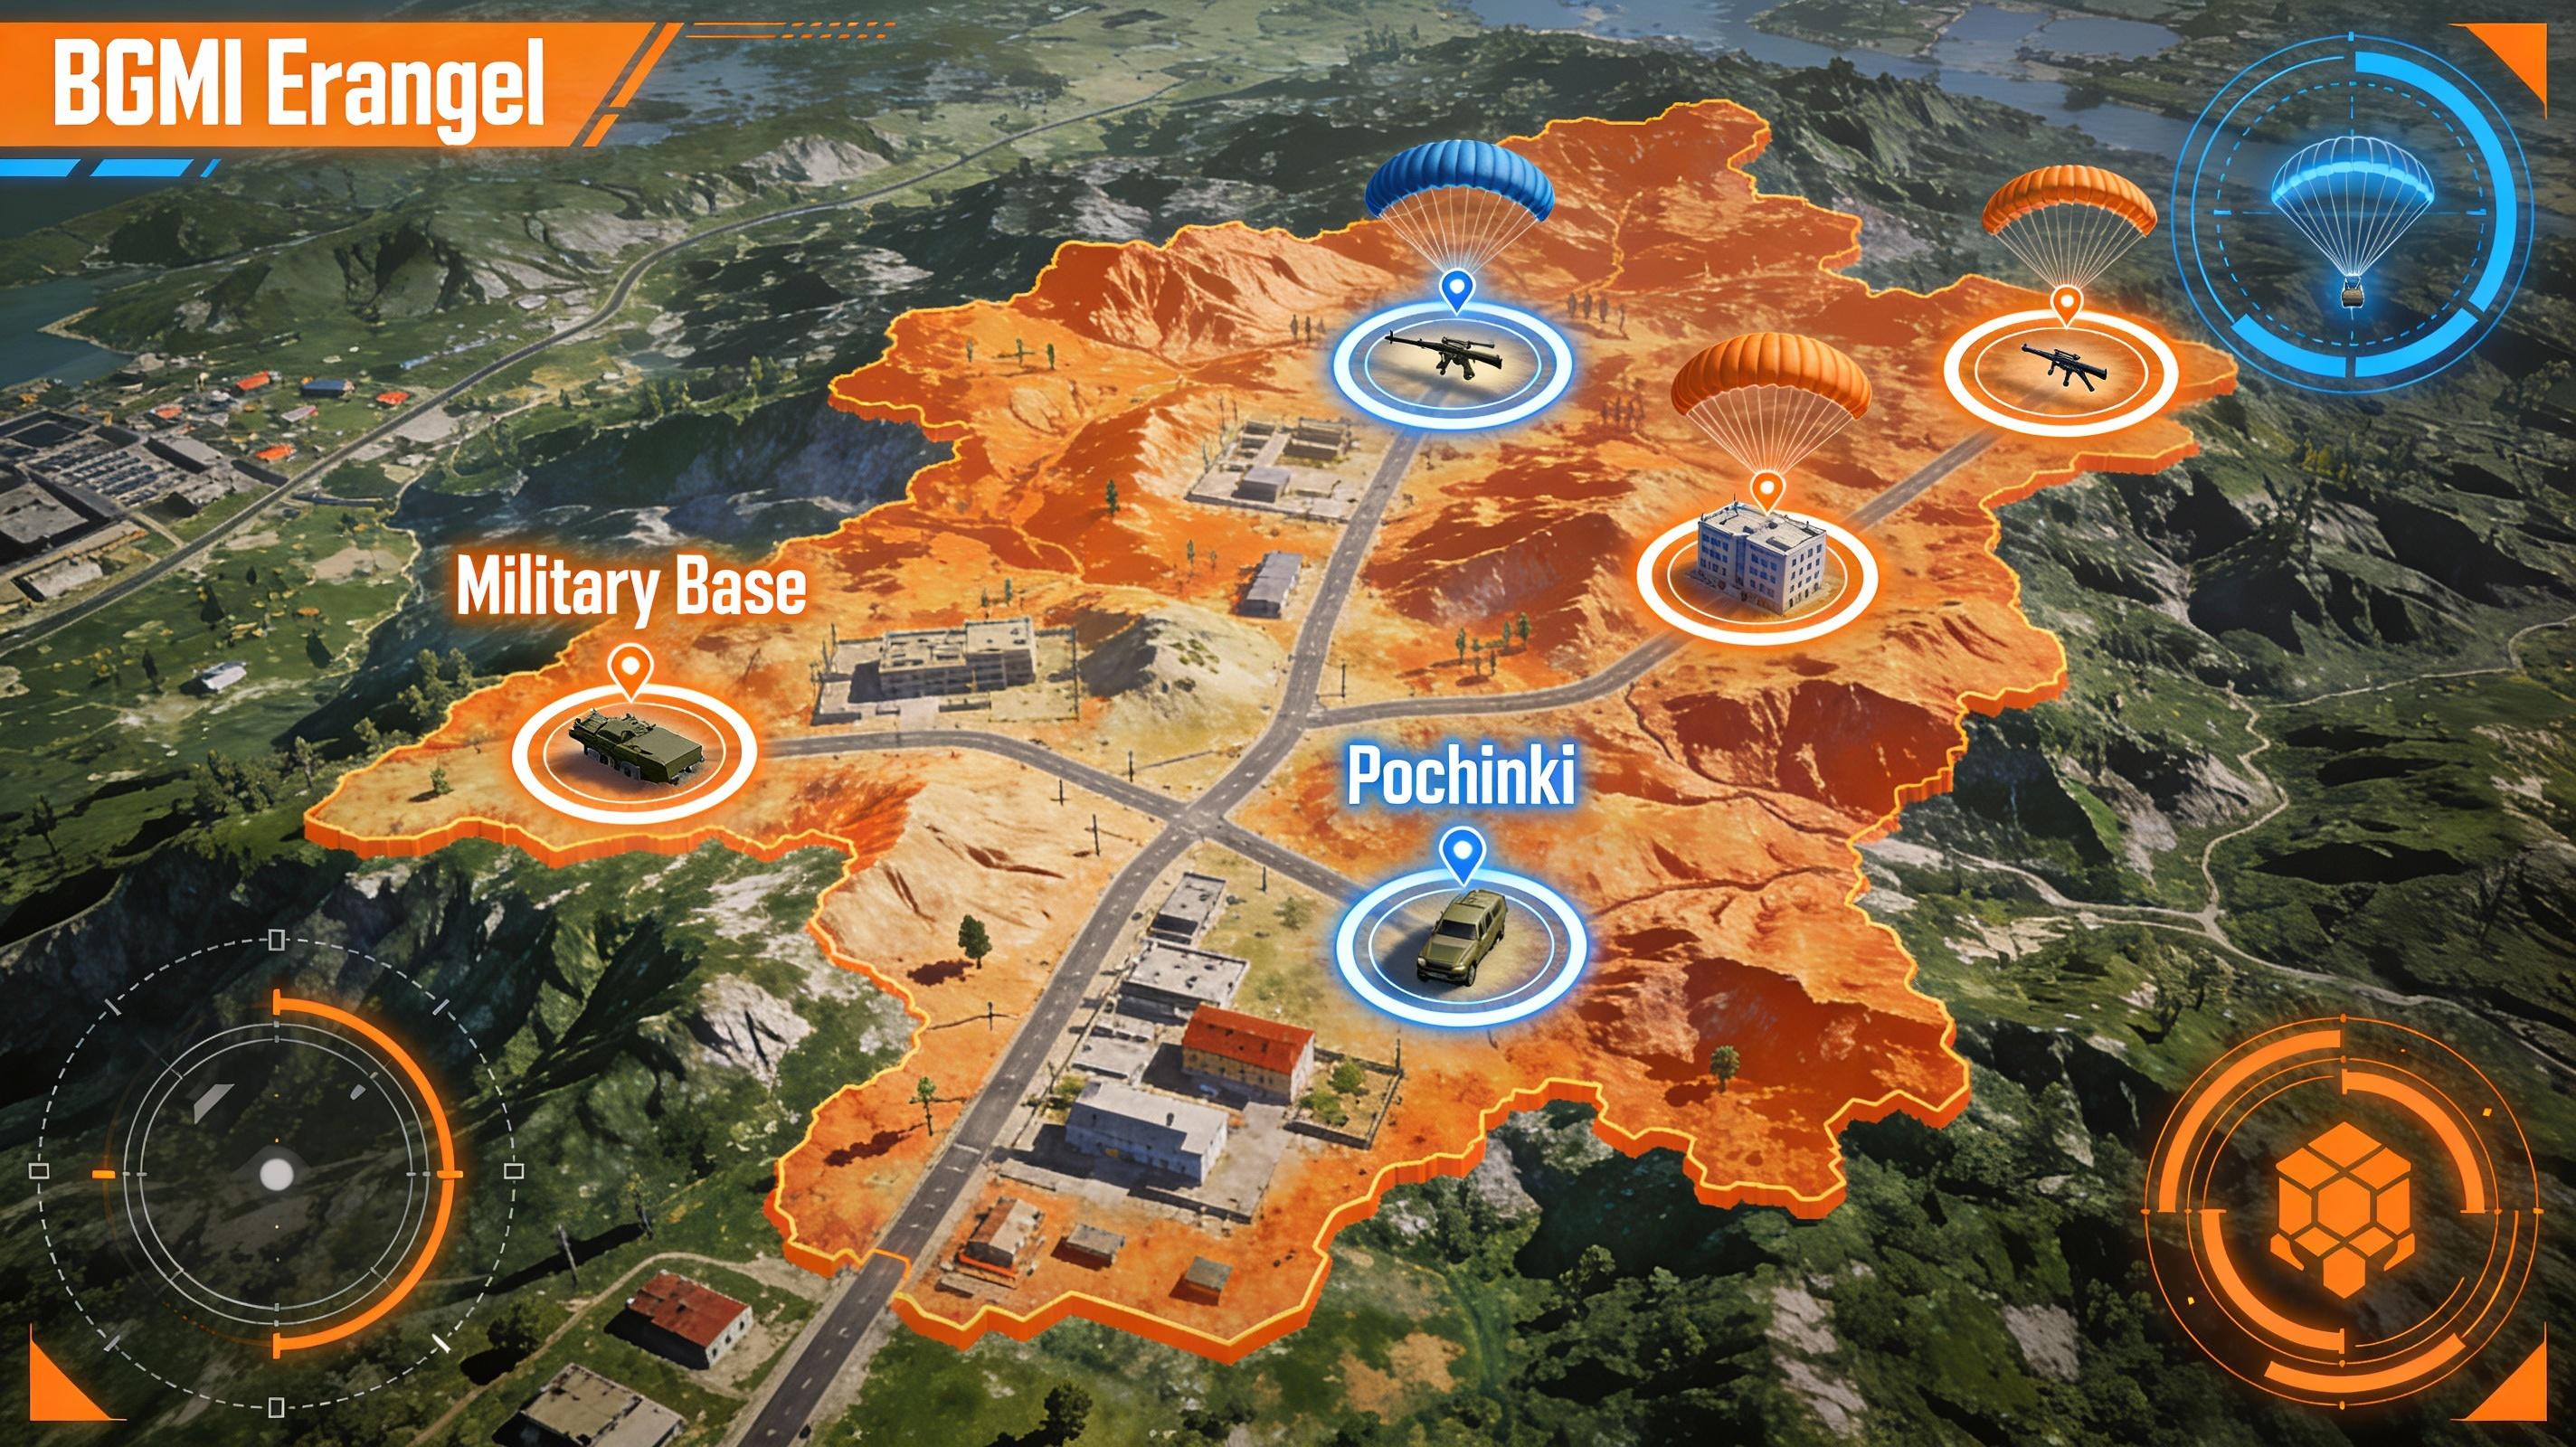
Erangel: Classic Map Drop Locations
1. Mylta Power (Semi-Hot) - Tier S
Why it works: Compact loot concentration with 15-20 buildings, predictable enemy spawns, and multiple rotation options toward center circles.
- Expected enemies: 2-3 squads (manageable early fights)
- Loot rating: 8/10 - Consistent Level 2 armor, ARs, scopes
- Vehicle access: 3 guaranteed spawn points (sedan near north road, buggy at east compound)
- Rotation paths: North to Sosnovka, East to Primorsk, West to Mylta for zone coverage
- Pro tip: Land on the two large warehouses first—best loot density per building
2. Pochinki (Hot Drop) - Tier A
Why it works: Central map position guarantees circle proximity, forcing other squads to rotate through your control.
- Expected enemies: 5-7 squads (chaos for first 3 minutes)
- Loot rating: 9/10 - Multiple Level 3 helmets/vests possible
- Survival strategy: Land 3-story building south side, clear systematically toward church
- Squad coordination: Assign each member one building cluster, regroup after initial loot
- Common mistake: Landing center street = crossfire death. Stick to building edges
3. Zharki (Cold Drop) - Tier B
Why it works: Extreme north location = zero enemies 80% of matches, safe looting for 5+ minutes.
- Expected enemies: 0-1 squad maximum
- Loot rating: 6/10 - Enough for full squad basic loadout
- Disadvantage: Long rotations to circle (need vehicle 100% of matches)
- Best for: Players climbing from Platinum to Diamond needing consistent top 10s
- Backup plan: If plane path crosses Zharki, immediately switch to Ruins or Kameshki
4. Military Base (Hot Drop) - Tier S+
Why it works: Highest loot density in Erangel—winning squad leaves fully equipped with Level 3 everything, 8x scopes, medical supplies for endgame.
- Expected enemies: 4-6 squads (separated by bridge, apartments, bunkers)
- Loot rating: 10/10 - Best in game
- Landing priorities: C-Buildings (3 large warehouses) for squad drops, avoid open fields
- Rotation challenge: Bridge campers at 15-minute mark—carry smokes and Molotovs
- Advanced tactic: Loot fast (3 min max), boat to mainland bypassing bridges entirely
📊 BGMI K/D Calculator
Track your performance improvement with different drop strategies
Calculate K/DSanhok: Fast-Paced Combat Drops
1. Paradise Resort (Hot Drop) - Tier S
Sanhok's Pochinki equivalent—central location with luxury villa loot spawns.
- Expected enemies: 6-8 squads in 4x4km compact map
- Loot rating: 9/10 (QBZ, QBU, Level 3 gear common)
- Landing strategy: Main resort building rooftop, work down floors clearing enemies
- Quick rotations: Sanhok's small size = always in circle, focus on kills over looting after 5 minutes
2. Bootcamp (Hot Drop) - Tier A
Alpha training area = guaranteed action with multiple building clusters for squad separation.
- Expected enemies: 5-7 squads
- Loot rating: 8.5/10
- Pro tactic: Land north buildings, third-party south fights after looting
- Escape routes: Rivers on east/west for quick boat rotations
3. Ruins (Semi-Hot) - Tier B
Ancient temple complex with vertical gameplay—stairs and elevated positions dominate fights.
- Expected enemies: 2-4 squads
- Loot rating: 7/10
- Advantage: Natural cover from trees + stone walls for mid-game holdouts
- Best weapons: DMRs excel here—long sightlines between temple structures
Miramar: Desert Warfare Drops
1. Pecado (Hot Drop) - Tier S
Casino city = massive loot with wide streets requiring different tactics than Erangel's tight buildings.
- Expected enemies: 5-6 squads
- Loot rating: 9/10 (casino alone supports full squad)
- Landing priority: Casino rooftop, clear top-to-bottom before exit
- Street combat: Avoid open roads—use building-to-building cover advances
- Vehicle critical: Miramar's size demands vehicle, loot one immediately after clearing area
2. Hacienda del Patron (Hot Drop) - Tier A
Mansion estate with tiered loot distribution—main house has god-tier loot, outer buildings scraps.
- Expected enemies: 4-5 squads fighting for mansion control
- Loot rating: 8.5/10 in mansion, 5/10 outer buildings
- High-risk-reward: Mansion winner gets fully kitted, losers struggle entire match
- Alternative plan: If contested, land outer buildings, wait for mansion survivors to exit weakened
3. Los Leones (Semi-Hot) - Tier B
Miramar's largest city—so big that 3 squads can land without immediate contact.
- Expected enemies: 3-4 squads spread across districts
- Loot rating: 7.5/10 (volume over density)
- Strategy: Claim one city section (north/south/east/west), ignore other squads until looted
- Endgame advantage: City buildings provide cover until final 3 circles if zone favors
Advanced Drop Selection: Reading Plane Path
Plane trajectory dictates 70% of drop strategy decisions. Master these principles:
Plane Path Analysis
- Perpendicular drops: Plane crosses your target location = expect 5+ squads. Switch to nearby alternative.
- Parallel drops: Plane flies beside target = 1-2 squads max (most land along plane path). Safe choice.
- Distant drops: Target 1500m+ from plane path = likely solo drop, but risky if no vehicle spawns.
- Early vs late jump: Jumping at match start = reach anywhere but telegraphs intent. Mid-plane jump = balanced approach.
Dynamic Decision Making
Don't lock drop spot before match. Observe:
- Count parachutes heading to primary drop = adjust to backup location
- Note squad markings on map (if visible) = avoid marked zones
- Check voice chat indicators = coordinated squads marked location
- Weather conditions in Season 4 = rain/fog matches favor close-range drops (SMGs dominate)
🎯 Pro Tip: The 2-Squad Rule
If you see 2+ enemy squads landing at your exact building cluster, immediately redirect to nearest compound 200m away. Loot there, then third-party the survivors when weakened. This strategy increases win rate by 35% over stubborn contested drops.
Post-Drop Rotation Strategy
Surviving drop ≠ winning match. Follow these rotation principles:
Timing Your Rotation
- 0-5 minutes: Loot primary location fully, secure vehicle
- 5-10 minutes: Check circle, begin rotation if edge of blue zone
- 10-15 minutes: Reach white circle, find compound to hold
- 15-20 minutes: Move to next circle center, avoid edge deaths
Circle Priority Positions
- 1st circle: Reach any position inside, loot stragglers rotating late
- 2nd-3rd circles: Take elevated terrain or compounds near center
- 4th-5th circles: Hard cover mandatory (buildings, rocks, ridges)—open field = death
- Final circles: Center position > edge position always. Trade kills for positioning.
Frequently Asked Questions
Should I change drop spots every match?
No. Master 2-3 locations per map—learn every building, loot spawn, and cover position. Familiarity gives 30-40% advantage over enemies discovering the area for first time. Rotate locations only if plane path makes primary spot too contested.
How do I improve consistency with hot drops?
Practice landing speed in training mode—get ground 1-2 seconds before enemies. Learn optimal building entry points (doors vs windows). Most importantly, communicate constantly with squad during chaotic first 3 minutes. Silent squads lose hot drops 80% of time.
What if my squad wants different drop types?
Compromise with semi-hot drops or rotate IGL role daily. Never split squad to separate locations—4v4 fights beat 1v1+1v1+1v1+1v1 every time. Find drops satisfying both aggressive and passive players (Mylta Power, Ruins, Los Leones work well).
Best drop for ranking up from Crown to Ace?
Semi-hot drops with guaranteed vehicle access. Focus on 4-6 kill games with top 5 finishes rather than 10+ kill with 15th place. Mylta Power (Erangel), Ruins (Sanhok), Monte Nuevo (Miramar) optimize points-per-match at Crown tier.
Conclusion
BGMI Season 4's ranked system rewards strategic drop selection over pure mechanical skill. Master 2-3 spots per map, adapt to plane paths dynamically, and prioritize survival points alongside kills. Remember: Consistent top 10 finishes climb ranks faster than occasional 20-kill matches ending in early deaths.
Practice your chosen drops in classic mode for 10-15 matches before taking them to ranked. The investment pays off through improved loot efficiency, better positioning, and higher win rates throughout Season 4.


